Observing the Moon
The object of the month this time is the closest celestial body to us: The Moon.
The Moon plays a big part in Astronomy for a number of reasons, the main one being light. Although the Moon does not generate light itself, it acts as a giant reflector for the sun. When the Moon is full it reflects enough sunlight to create shadows on the ground. It is even possible for the Moon to reflect sunlight that is itself reflected from the Earth. This is called earthshine.
Earthshine occurs during the new Moon lunar phase when a small amount of sunlight is reflected from the Moon creating a crescent Moon and sunlight reflected from the Earth illuminates the rest of the Moon. The earthshine is far fainter than the moonshine but it does let you see the entire Moon.

For astronomers the Moon can be quite inconvenient. The light it reflects has the effect of flooding the night skies and obliterating the faint stars, galaxies and nebula for all periods other than around new Moon. Of course this does give us at least one celestial body to observe, which is probably why the Moon is the most popular object for astronomers.
The phases of the Moon determine what an observer can see. At new Moon there is nothing visible of the moon and with clear dark skies the wonders of the Universe are opened up to us. As the nights progress a crescent Moon appears then fills out over the nights until seven days later the waxing Moon is at first quarter or half moon. During this period the Moon rises during the day and sets in the early evening, gradually rising later in the morning and setting later in the evening. A further seven days later there will be a full Moon when the moon rises at dusk and sets at dawn and is in the sky all night. During the period from first quarter to last quarter the skies will be washed out and little observing can take place. Finally as the waning Moon enters the last quarter it rises later in the evening and sets during the daytime. It is during this period that observing during the night can take place before the Moon exerts its influence on the night skies.
To observe the Moon one might expect that the best time would be during the time around full Moon. To a certain extent that would be correct, but really the proper answer to the question is any time that the Moon is in the sky, even during the day.
Although at full Moon the entire surface of the Moon will be visible this is actually not the best time to look at it. The best details are observed during the waxing and waning of the Moon. It is at this time that the terminator can be seen. The area around the terminator shows a lot more detail of the surface of the Moon due to the angle that the sunlight hits it. This creates shadows revealing much more detail in the craters, which look completely different than when they are fully illuminated. As the days progress and the more of the Moon is revealed different parts of the surface are exposed at the terminator.
 Viewing the Moon
Viewing the moon can be done without any optical equipment. The seas are clearly visible and, of course, the daily changes between crescent Moon and full Moon can be seen.
A small pair of binoculars will enable more of the detail of the Moon to be discovered, the major craters of Tycho and Copernicus are clearly visible along with more minor ones. The seas become more delineated with the boundaries being particularly visible.
Moving up to a telescope at low power the entire sphere of the Moon can be viewed in the eyepiece. Changing to a higher magnification allows you to zoom in on the detail of the lunar surface, and will reveal great delights along the line of the terminator. At these higher magnifications you are more subject to the turbulence of the atmosphere, which will make the view shimmer in the thermals, but on a steady night will allow intricate details to pop into focus. The trick is to keep looking and over time you will get some stunning views.
Imaging the Moon
Imaging the Moon can be quite a challenge, the main problem being getting the exposure correct. To achieve this you really need a camera with manual controls. When looking at the Moon it appears quite large in the sky, which it is compared to the stars, but through a camera lens it is quite small. Most cameras will average the exposure for an image which means that with the majority of the frame being dark the surface of the Moon will be vastly overexposed and no detail will be visible. When setting the exposure manually the effects of the background can be eradicated and the details of the Moon can be imaged.
There are a multitude of ways that the Moon can be imaged. Firstly it can be captured as part of a landscape image, this will be very tricky with exposure settings as mentioned above. The best option for a landscape is to merge two images, one exposed for the landscape and one for the Moon.
A friend of mine takes an artistic approach to imaging the Moon. Using a long telephoto lens of about 500mm he gets a nice large Moon but he focuses on something like a leaf or branch in front of the Moon. This throws the Moon out of focus acting as a circular light source with the subject in the foreground.
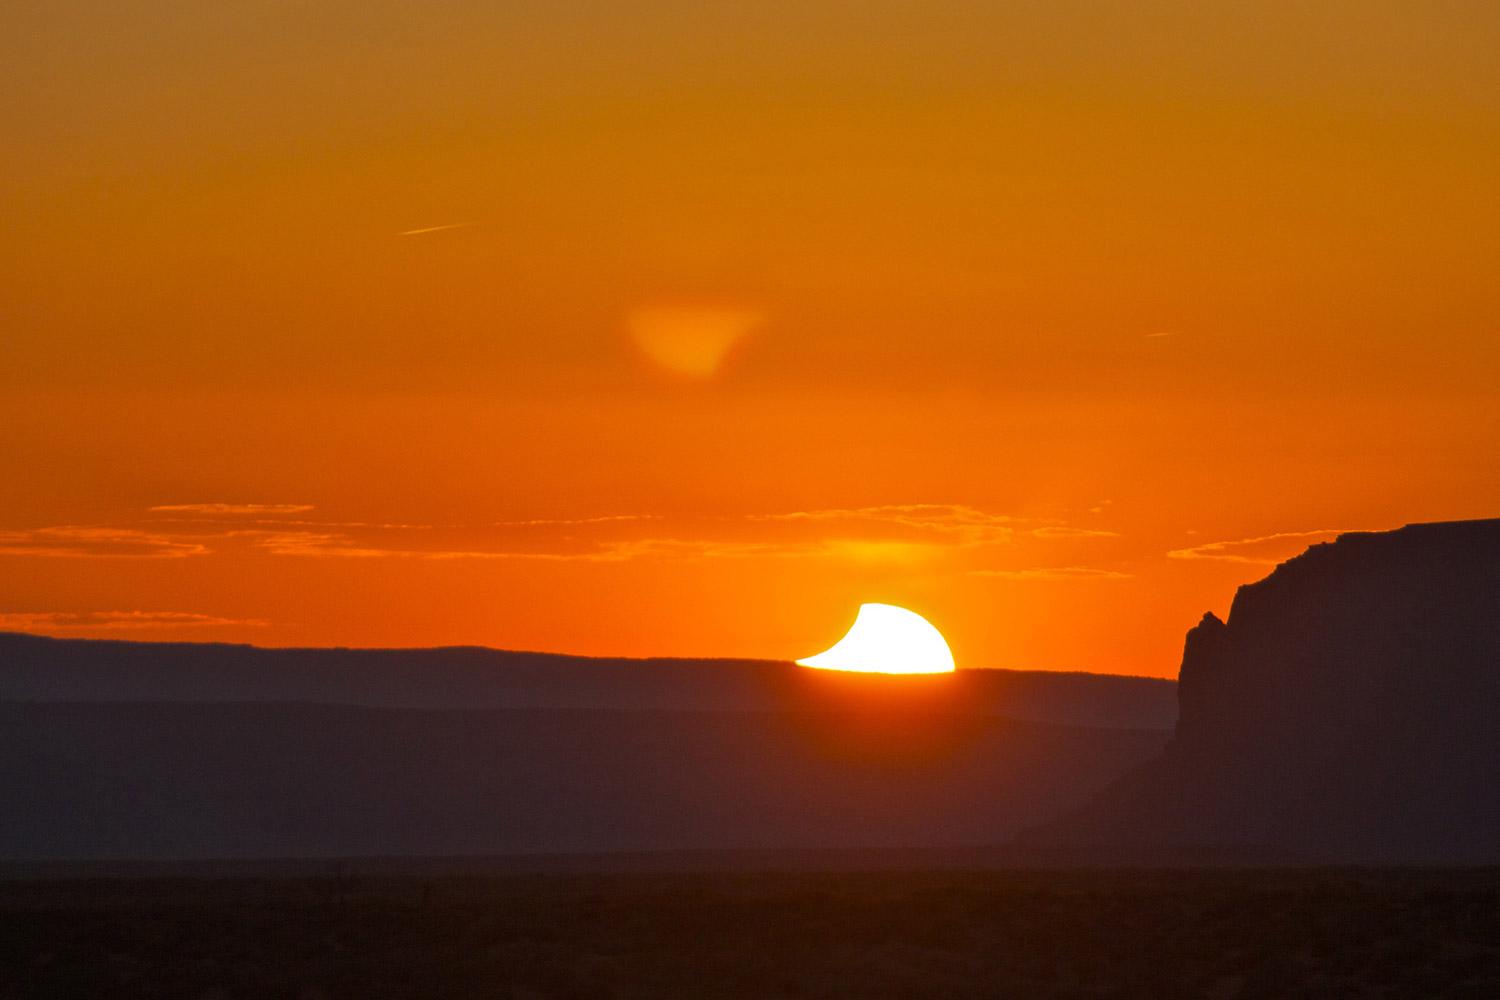
It is even possible to image the Moon and the Sun together in an eclipse without filters, but great care needs to be taken to avoid damage to your camera, and more importantly yourself. Never look at the Sun directly or through a telescope without the correct filter to ensure that you do not damage your eyes. If in doubt do not do it. The eclipse image here was taken using a special solar filter. The second landscape image of the partial eclipse was taken at sunset over Monument Valley when it was safe to take a photograph with no filters.
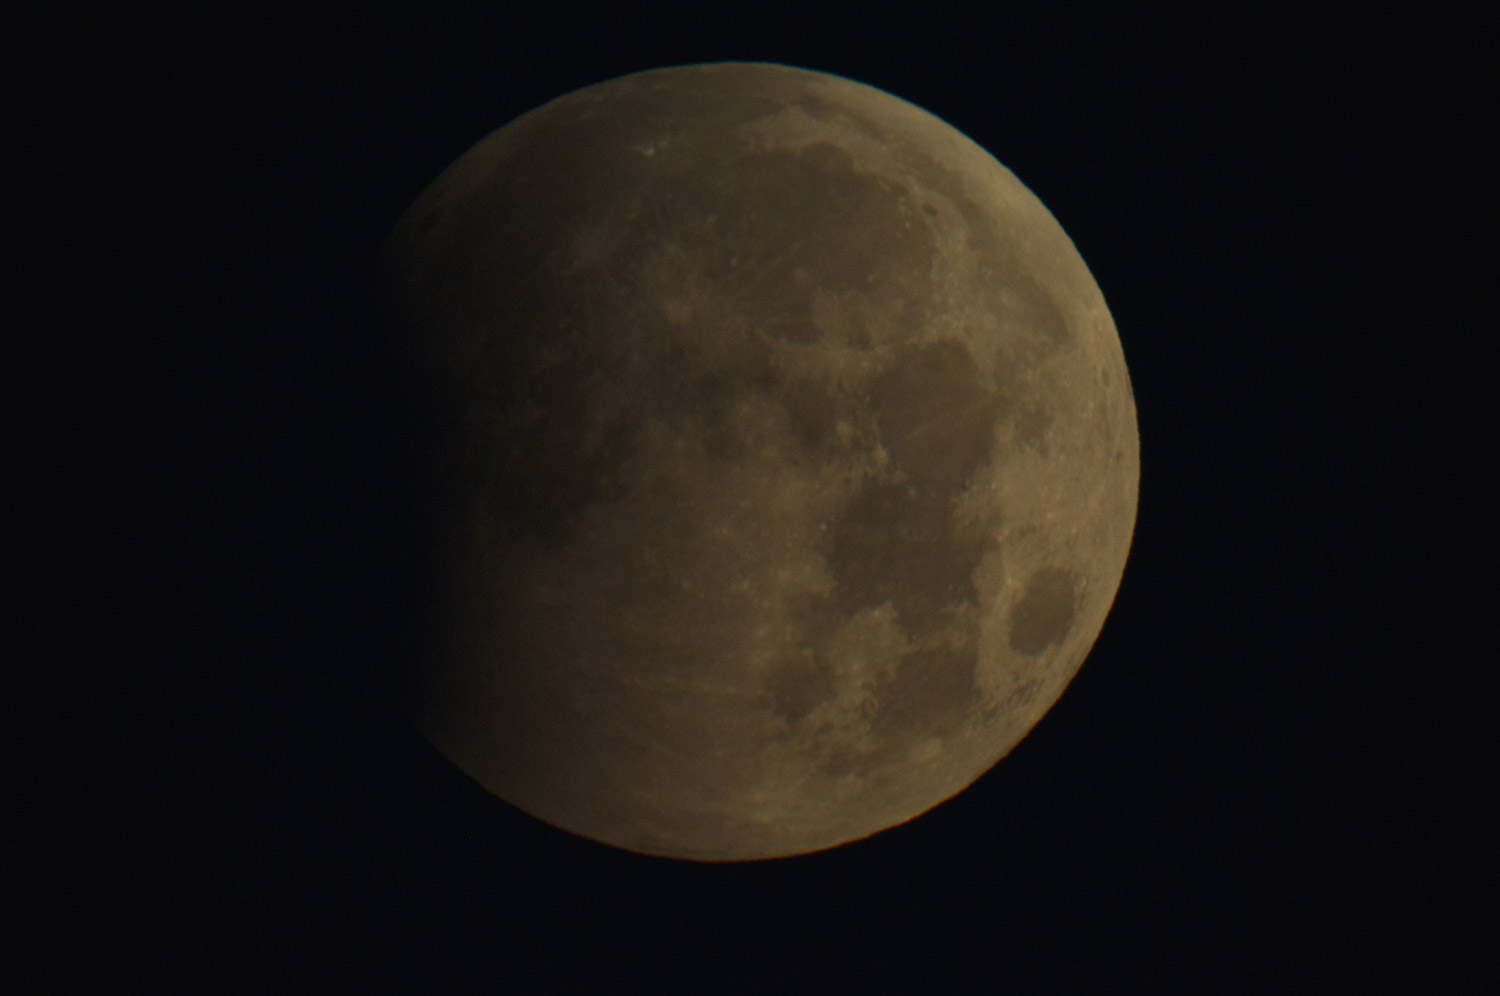
Two weeks after a full eclipse there will be a lunar eclipse. During the lunar eclipse you can safely take images of the moon as the Sun will not be in the sky. During the lunar eclipse, which always occurs during full Moon, the Moon passes through the shadow of the Earth. As it enters the shadow the Moon dims, but with no sharp delineation as with a solar eclipse, when it enters the Earth’s shadow it turns red, which leads to the term “Blood Moon”.
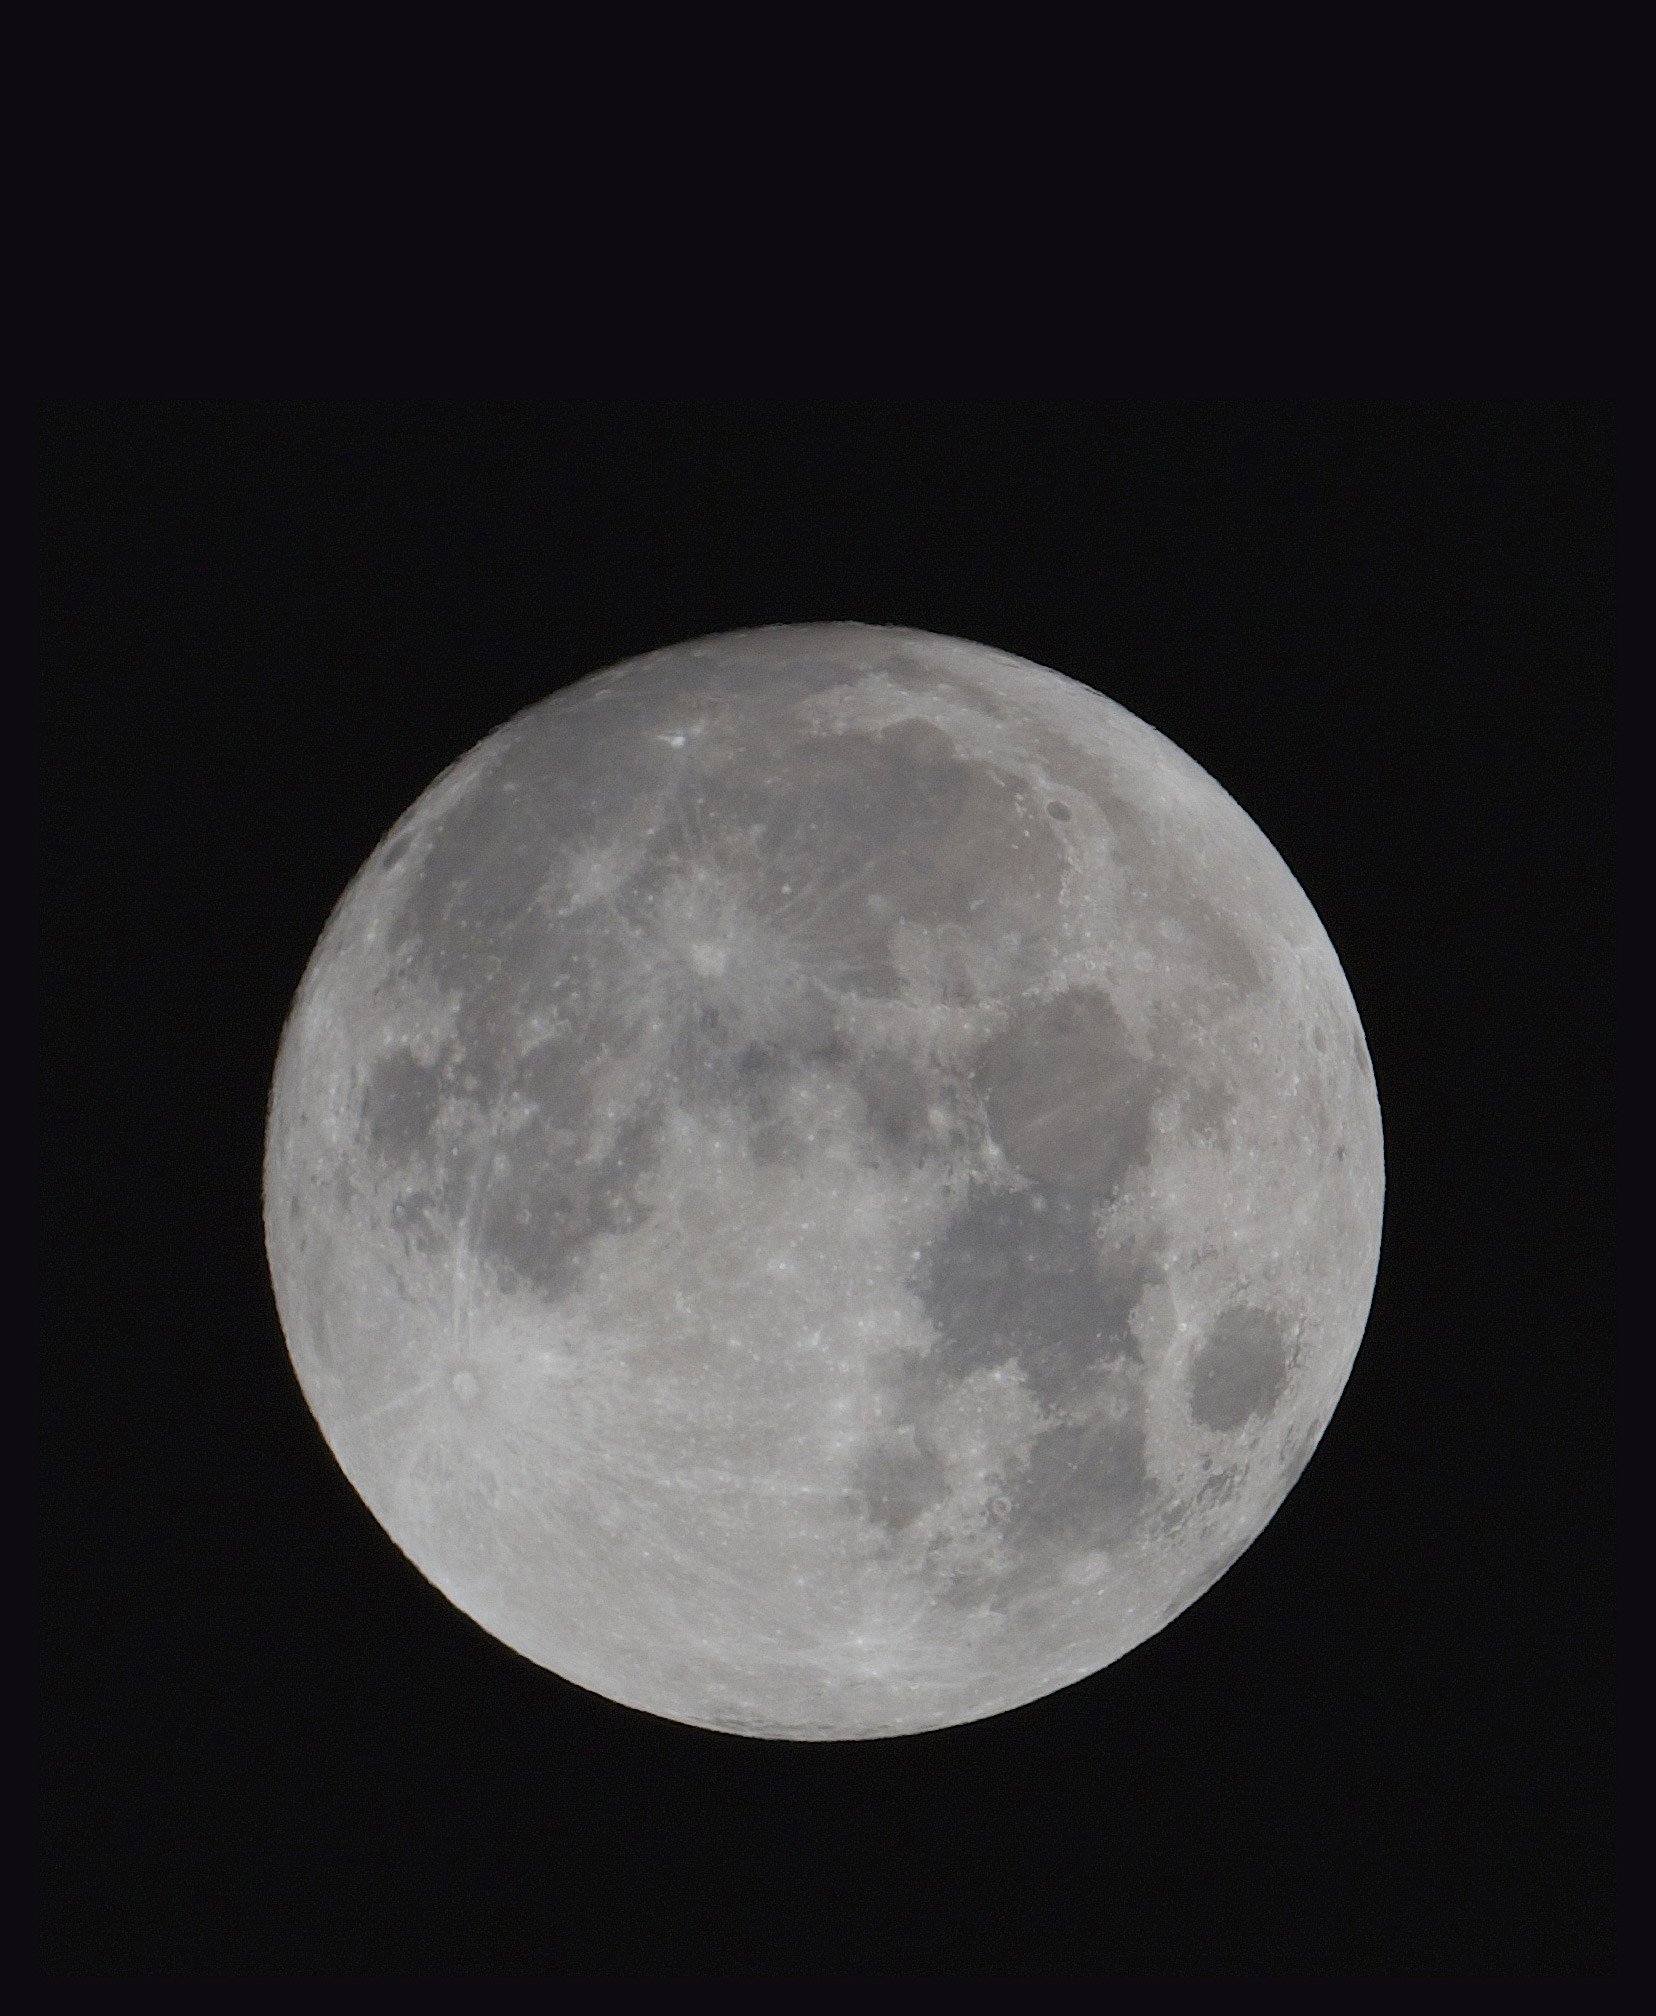
A more traditional image of the Moon can be taken with a medium telephoto lens on a DSLR camera. Using a tripod to steady the camera an image can be taken which will show good detail of the Moon. The image will only cover a very small part of the frame, but can be cropped to produce a reasonable sized picture with lots of detail. It is always good practice to take a number of images at different exposures to enable you to process and select the best ones on your computer. The example images were taken with a Canon T3i camera and a 200mm lens with an exposure of 1/125 second at f11 and ISO 100. This was for a full Moon, and can be used as a starting point. At other times of the month the Moon will reflect a lot less light so the exposure will need to be adjusted accordingly.
For even closer images then you need to start using a telescope with a DSLR attached to it. This setup is the type that was described in the previous issue. Telescopes have a focal length starting at around 450mm (in DSLR terms) and going right up to 1250mm and beyond. The same techniques apply as for shooting with a DSLR and normal lens with the exception that the f-stop is fixed so the ISO and shutter speed need to be adjusted to get the best exposure.
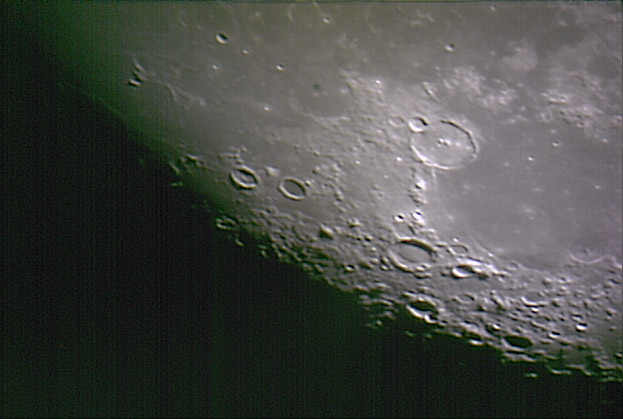
To get really close images of the features of the Moon a Planetary or WebCam attached to a telescope is required. This will allow you to get incredibly close pictures of the lunar landscape. The problem with this is that the atmosphere of the Earth makes the images very distorted and unstable. To overcome this a technique has been developed that takes a video then processes the individual frames of the video dropping the bad ones and combining the good ones to create some stunning images of the features of the Moon.
Next issue I will cover the basics of this imaging and processing which applies to planets as well as the Moon.

