If you thought buying a telescope was confusing and complicated, then moving on to astrophotography can be even worse. This arises because of the myriad of different types of photography that can be done, the budget available, and the celestial objects that you want to image. Astrophotography can range from taking starscapes with your existing camera at one end of the scale all the way up to using dedicated CCD cameras with filters on tracking mounts, and a whole wealth of options in between.
However getting started in astrophotography does not have to be expensive, a lot can be achieved using imaging equipment that you may already own, or could borrow. This article will just focus (pun intended) on the equipment side for your introduction into astrophotography. Taking the picture is only part of the sequence to obtaining some stunning images.
A later article will look at the software processes on your computer that will turn the output from your camera into a jaw dropping picture. I will also cover more advanced astrophotography in another article discussing guiding and combining images to reduce noise and bring out more detail.
One way to get going in astrophotography is to try and use the imaging equipment that you have already without spending a penny. People may laugh at this, but it is perfectly feasible. You will not get the best results, but at least you will get some passable imagery, and with a bit of patience and perseverance these can be very acceptable. This of course means that you start with your existing camera. These days almost everyone has a camera in the form of a smartphone, and believe it, or not, the smartphone can take some good astro pictures.
Using a Smartphone
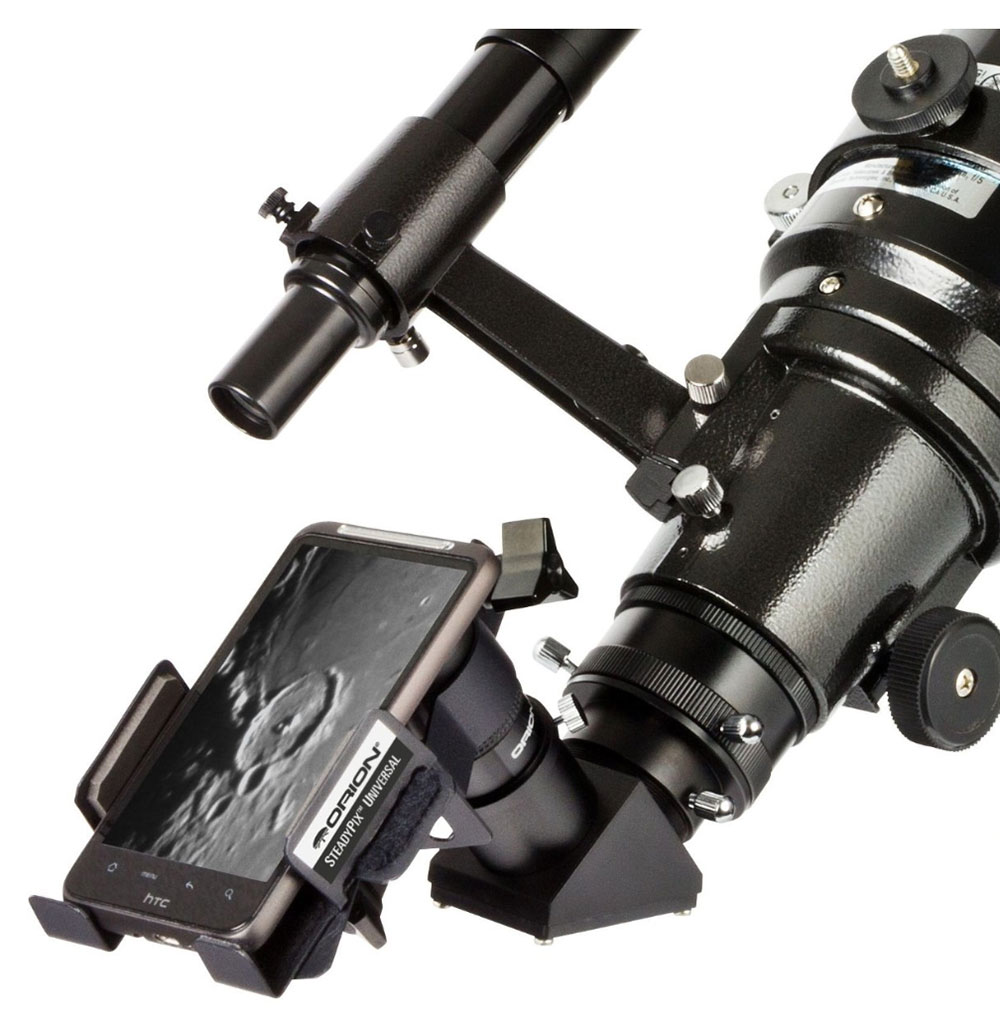
To use the phone’s camera all you need to do is line it up with the eyepiece of a telescope and take the picture. A lot of these will not be very good, but with some practice you will improve.
This method of astrophotography is called afocal imaging. The manufacturers have realised there is a market out there for this type of photography and have developed a number of attachments for telescopes that hold the camera firmly in the correct position. This makes the process a lot more reliable and repeatable.
Using this method of imaging can also be applied to compact cameras. all that is required is that the camera can focus on the image in the eyepiece.
Of course there are limitations to this, in particular the fact that this is a snapshot of the image and is not suitable for long exposures, but it is a start.
Using a Compact Camera
Staying with the concept of not spending any money you can use your existing camera to take starscapes. All you need is a camera that can take exposures up to 30 seconds or one that has a night scene setting. The camera should be set at the highest ISO setting of 3200 or 6400. You will then need a tripod, beanbag or some other form of stabilisation to prevent the camera moving during the exposure. If you find a nice dark spot with no lights around this will give you some lovely images of the stars, showing you far more than you could ever see with your eyes. If your camera has a bulb setting and a means of triggering it without touching the camera then you can start to take longer exposures of 2 to 3 minutes. With exposures of this length you will start to see the stars trailing.
These star trails occur because the heavens rotate around the celestial poles. In the northern hemisphere they rotate around Polaris. Star trailing is something that astrophotographers try to eliminate, but they can be used in a very artistic manner by taking lots of images and then merging then together to form streaking lines as the heavens rotate. In general you will find that any exposure longer than 30 seconds will start to show trailing, if you use telephoto lenses then that time can be reduced to just a few seconds.
Using a DSLR
A single lens reflex camera with interchangeable lenses or more specifically the DSLR that has replaced wet film cameras is the dream imaging device for budding astrophotographers. I used my trusty old Nikon D300 as my main camera in astrophotography for quite a while before I moved on. The DSLR is such a flexible camera that it can be used in a number of ways to create some stunning images. The beauty of the DSLR is not only the interchangeable lenses but also the control that can be gained over the exposure of the image.
A standard DSLR has a slight drawback in that the infrared filter over the sensor also blocks light in the hydrogen alpha (HA) spectrum. The HA spectrum is where the light from the stunning red emission nebulas originates. However, don’t be put off, there are still thousands of objects that can be imaged.
Again starting with just a DSLR and a tripod you have a lot of artistic capacity to utilise. I like to use a wide angle or standard lens and take exposures of up to 30 seconds. The wider angle the lens the longer the exposure that you can take. My 10.5mm fisheye lens is perfect for taking the majority of the night sky and is wonderful for meteor showers where the meteors can streak across the sky from just about any location. Moving up to the 50mm standard lens the narrower field of view is ideal for imaging constellations. My longest lens is a 200mm telephoto lens, which is a great lens for terrestrial photography, but not so good for astrophotography as trailing occurs at even short exposures. There is a way around this which I will explain later.
The important thing about taking images with your DSLR is to keep it very still whilst taking the exposure. This will generally require a tripod, but you can improvise with beanbags, or even a wall. A cable release of some form or other will allow the camera shutter to be controlled without having to touch the camera. This means that there will be no shaking or movement when taking the picture. As a guide to exposure you should put the camera into manual. I generally shoot with the aperture wide open for 30 seconds at the highest ISO setting on the camera. You can use a lower ISO setting to reduce the noise in the image, but you will also lower the sensitivity and the number of stars that can be recorded.
Focusing can be a little problematic as the lens actually focusses beyond infinity, so you cannot just set is at the end of the focus movement . You need to set the focusing mode into manual focus and turn off any image stabilisation, if the lens has it. I find that focusing during the day on something as far away as possible helps me get set up. A piece of electrical tape is your friend here as it can be placed over the focus ring and prevent movement. When night falls and you set up to take your pictures there should only be a small amount of fine adjustment required to bring the image into full focus.
Computerised Camera Control
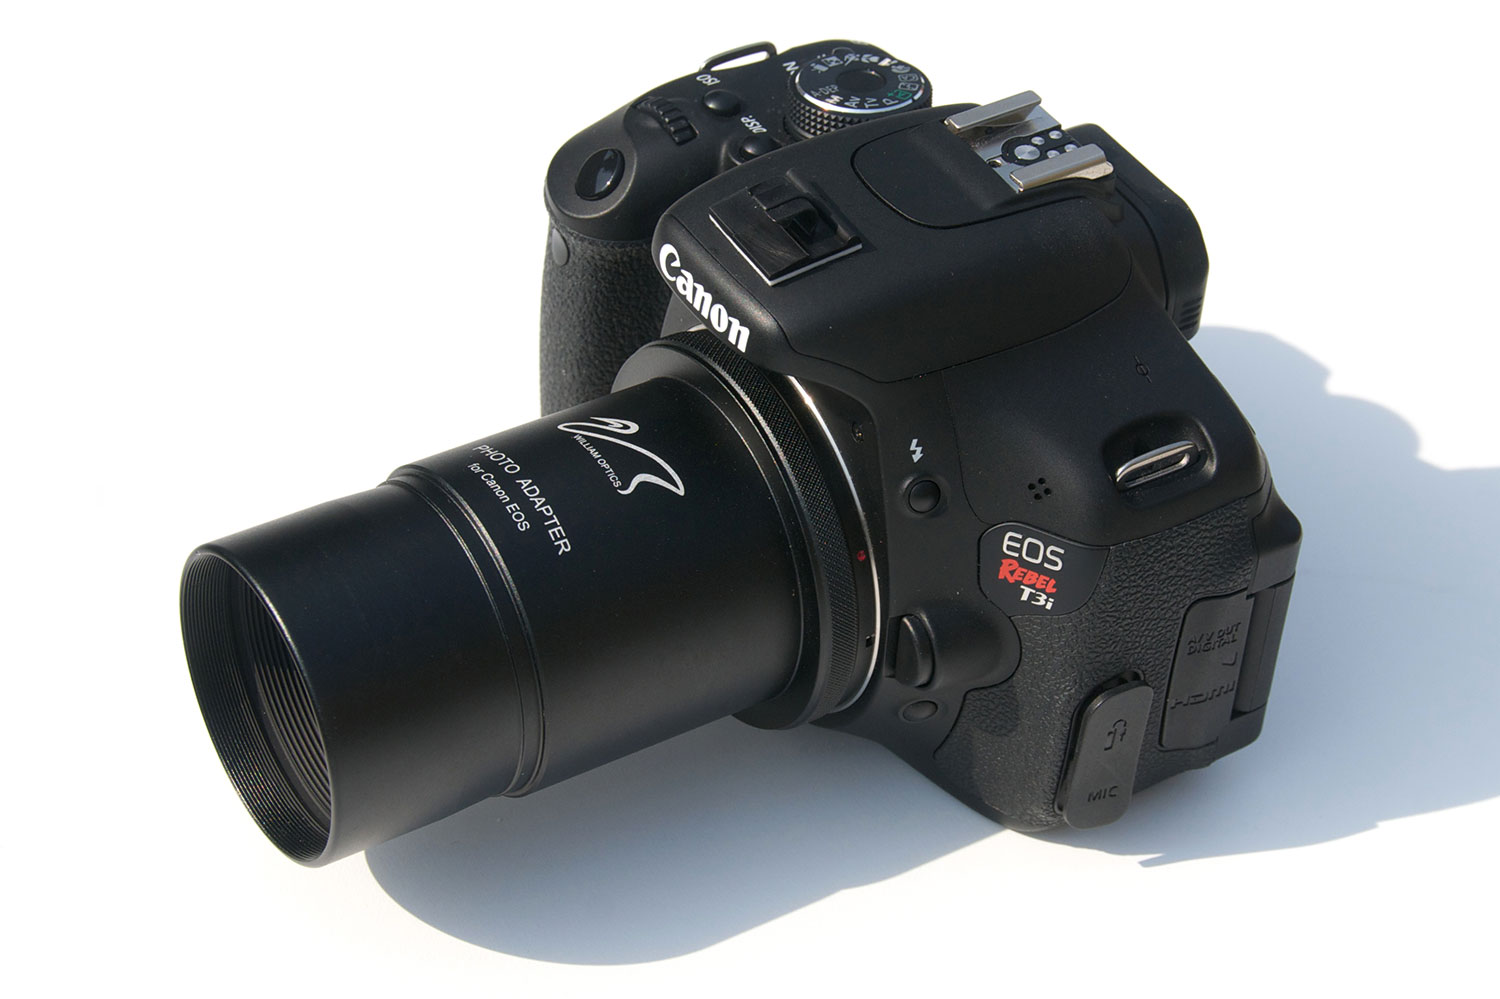
If you want to get a bit more serious about astrophotography and have a laptop and compatible camera you can shoot in tethered mode. This is where the computer controls the features of the camera. Canon cameras are particularly useful for this as there is a lot of software available, both Commercial and Freeware, that can control the entire imaging process. I still have my D300, but I decided to get a dedicated astrophotography camera, and after a lot of comparisons decided to go for the Canon T3i a versatile workhorse that could be fully controlled by my computer. I also use APT – Astro Photography Tool a Freeware imaging application. APT does far more than just control the camera, but this is the area that I am covering here. For more details about APT check their website at www.ideiki.com.
Just above I mentioned the problems with focusing at night. APT is able to control the camera lens and provide you with far finer control over focusing than you can ever do manually. It also has a number of features that assist in achieving focus including live view, lens control, autofocusing, and focus aid. Using these tools help you frame and focus your image. APT also has a feature that allows you to program a sequence of shots enabling you to automate the process of your night work. I have just touched on the surface of what the program can do and there are many other alternatives out there that do the same thing. As each camera offers different facilities check with the compatibility charts before you make a final decision about a new purchase or acquisition.
Connecting to a Telescope
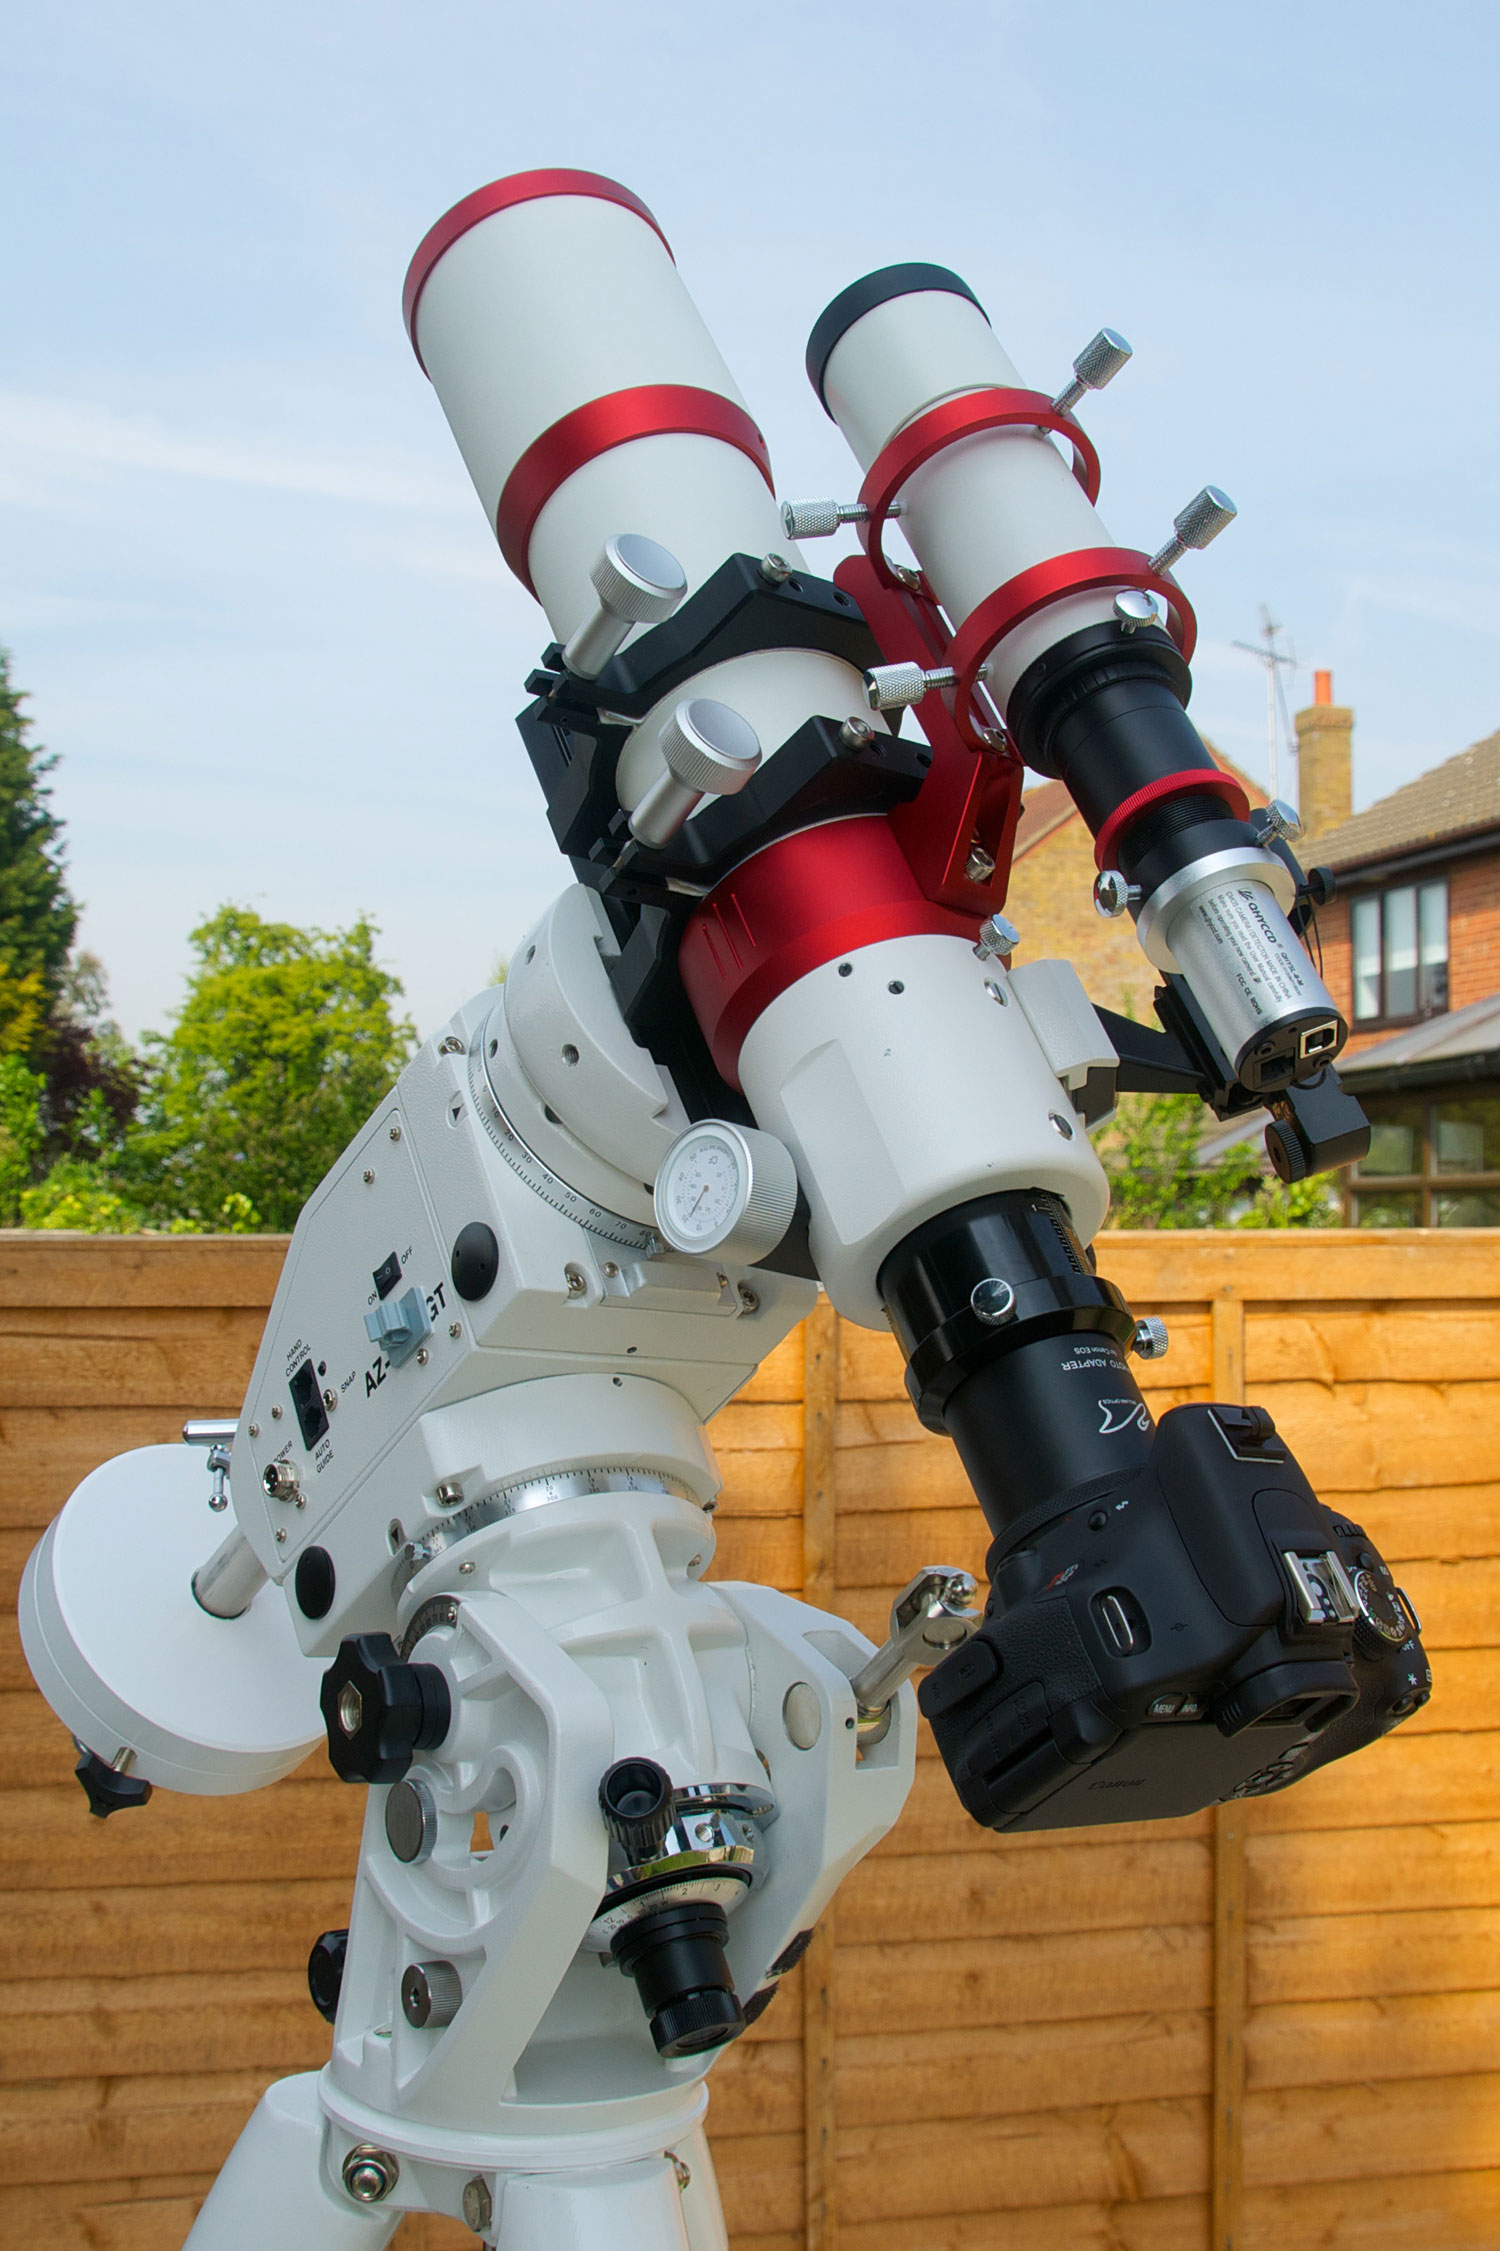
So far I have just mentioned using a DSLR as a stand-alone camera, but a main concept of astrophotography is to take images through a telescope. This is where the benefits of the interchangeable lenses come to the fore. Why not replace the lens with a telescope? The mechanics of this is surprisingly easy. The camera lens bayonet fitting has long been used by manufacturers of third party aftermarket lenses to provide a specific camera mounting to a generic lens. This is known as a T2 mount and has the bayonet on one side with a thread inside. The thread is used to screw in an eyepiece adapter resulting in a sturdy connection between the camera and the telescope. The telescope then becomes a long focal length lens.

There are a couple of drawbacks to using this method for connecting a camera to a telescope. The main problems are backfocus and star trailing.
Backfocus in astrophotography is the ability of the focuser to move sufficiently to achieve focus in the camera. If you look at a DSLR there is normally a mark on the body indicating where the sensor is. This is also the focus point of the camera. An eyepiece has it’s focal point some way below the eye, but a camera has it above the plane where your eye would be. This means that the telescope focuser has to be able to move in far enough for the camera to achieve focus. This is normally not a problem with a refractor telescope or a cassegrain reflector, but can be on a Newtonian reflector. On the Newtonian this can often be overcome by using a Barlow lens which shifts the focus point and can allow the camera to achieve focus.
Star trailing was mentioned above and it can be used to generate some lovely artistic effects, but generally astrophotographers want pin-sharp stars and long exposures. Back in the second issue of RocketSTEM we looked at the various types of telescopes and mounts. For astrophotography the German equatorial (GEM or EQ) mount is a must. This tracks the motion of the stars through the night sky allowing longer exposures without the stars trailing. However even with a telescope there is always the bright moon that can be imaged.
Credit: Mike Barrett
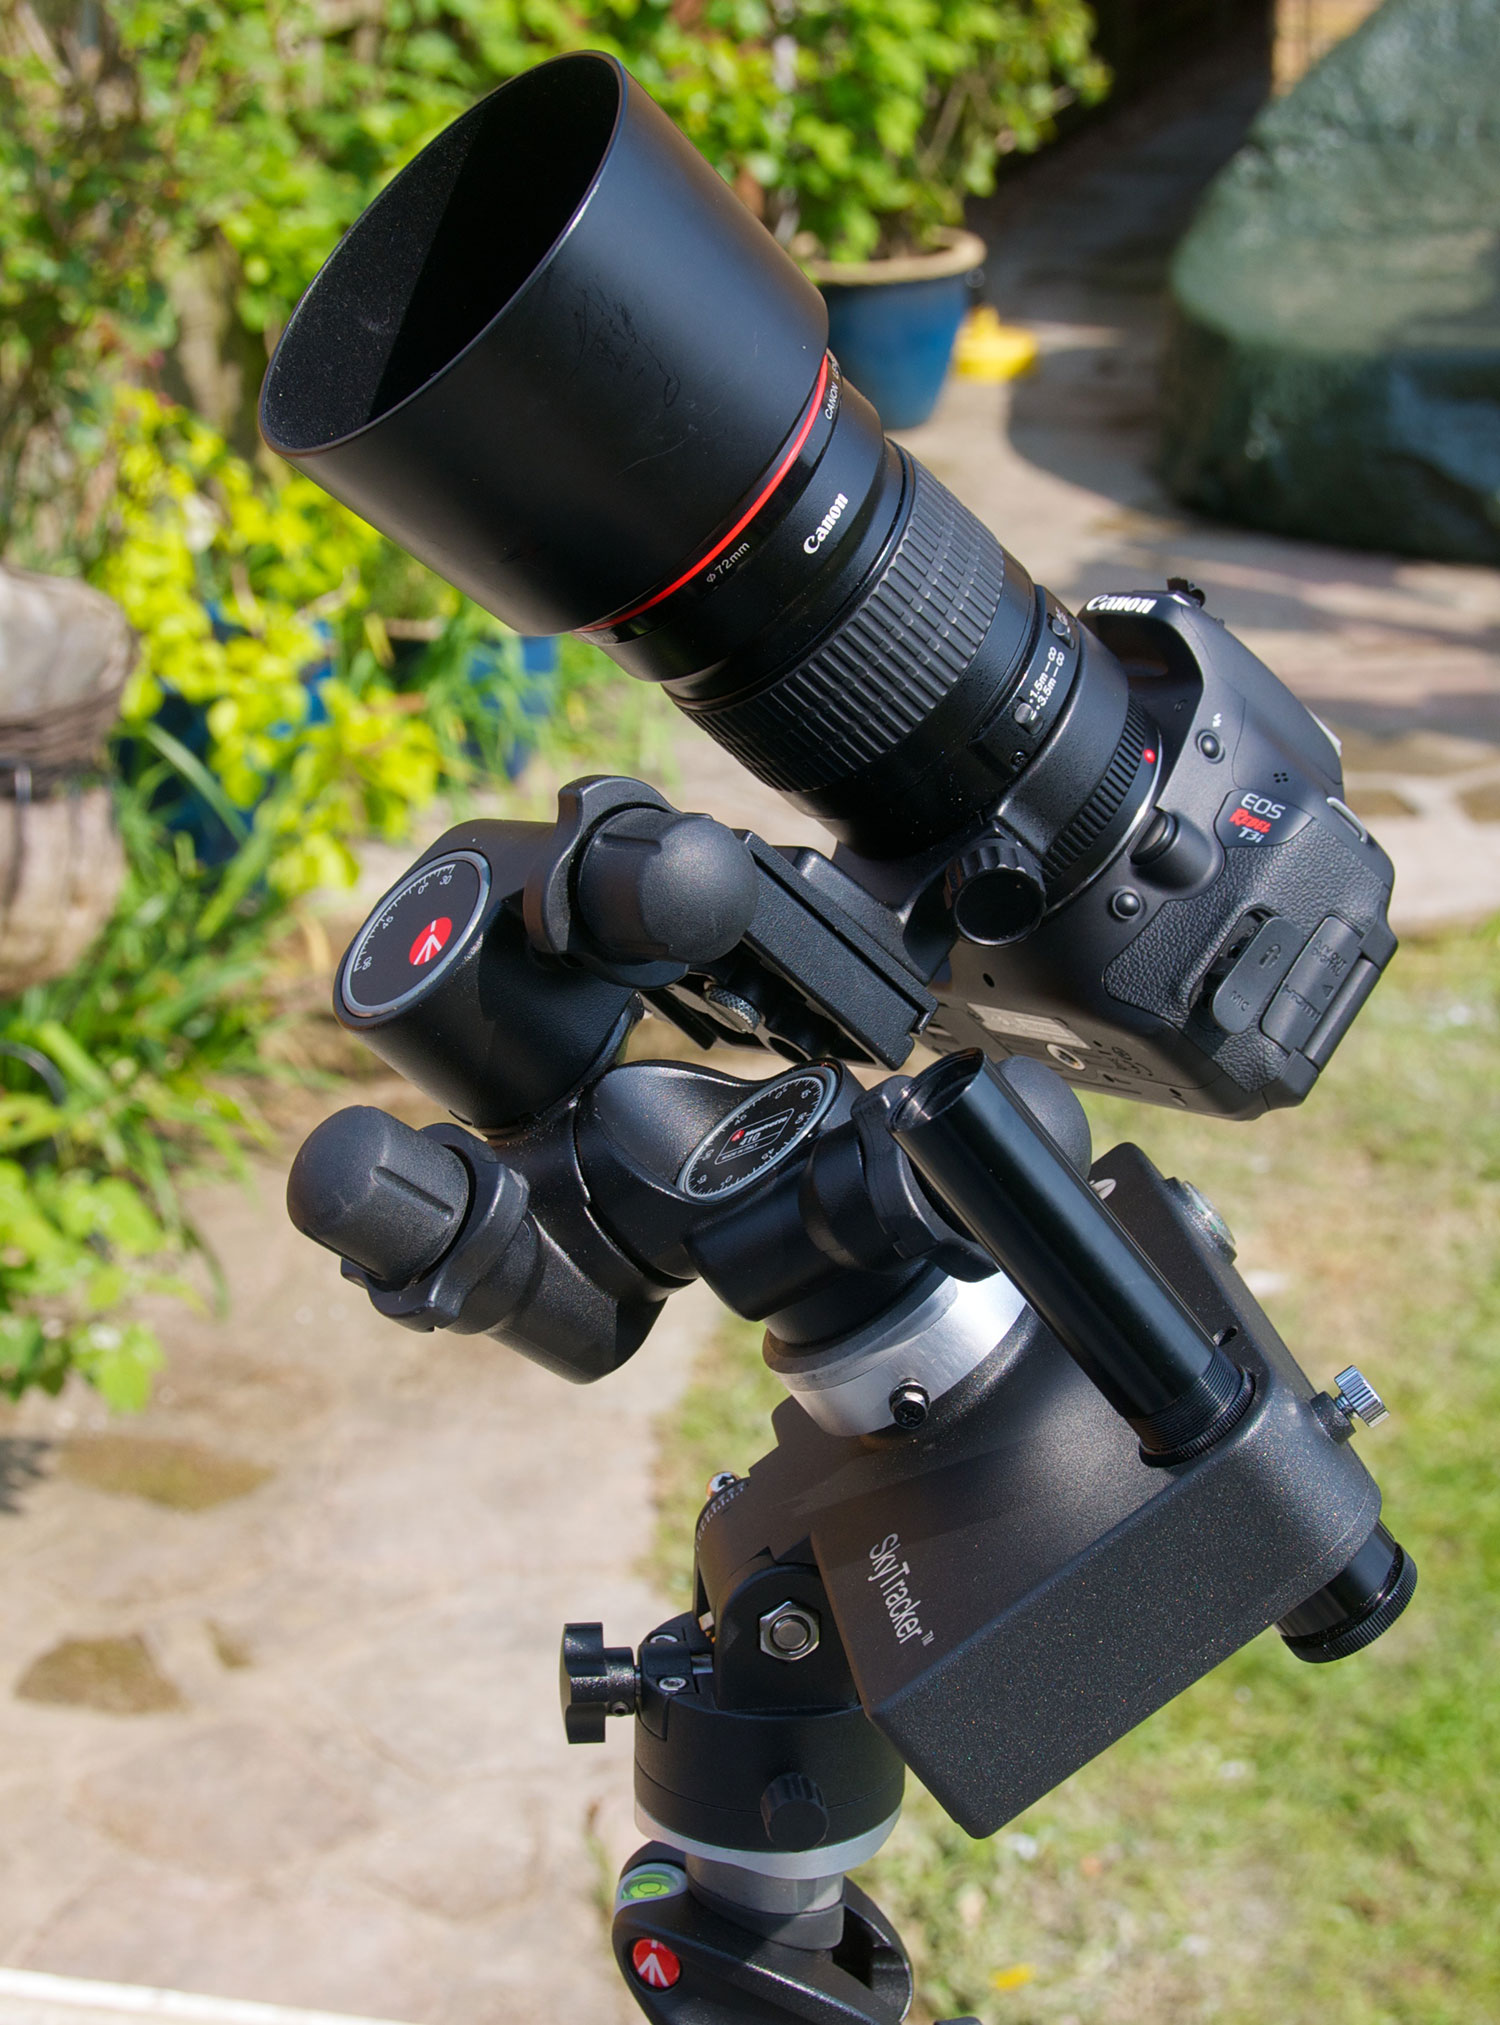
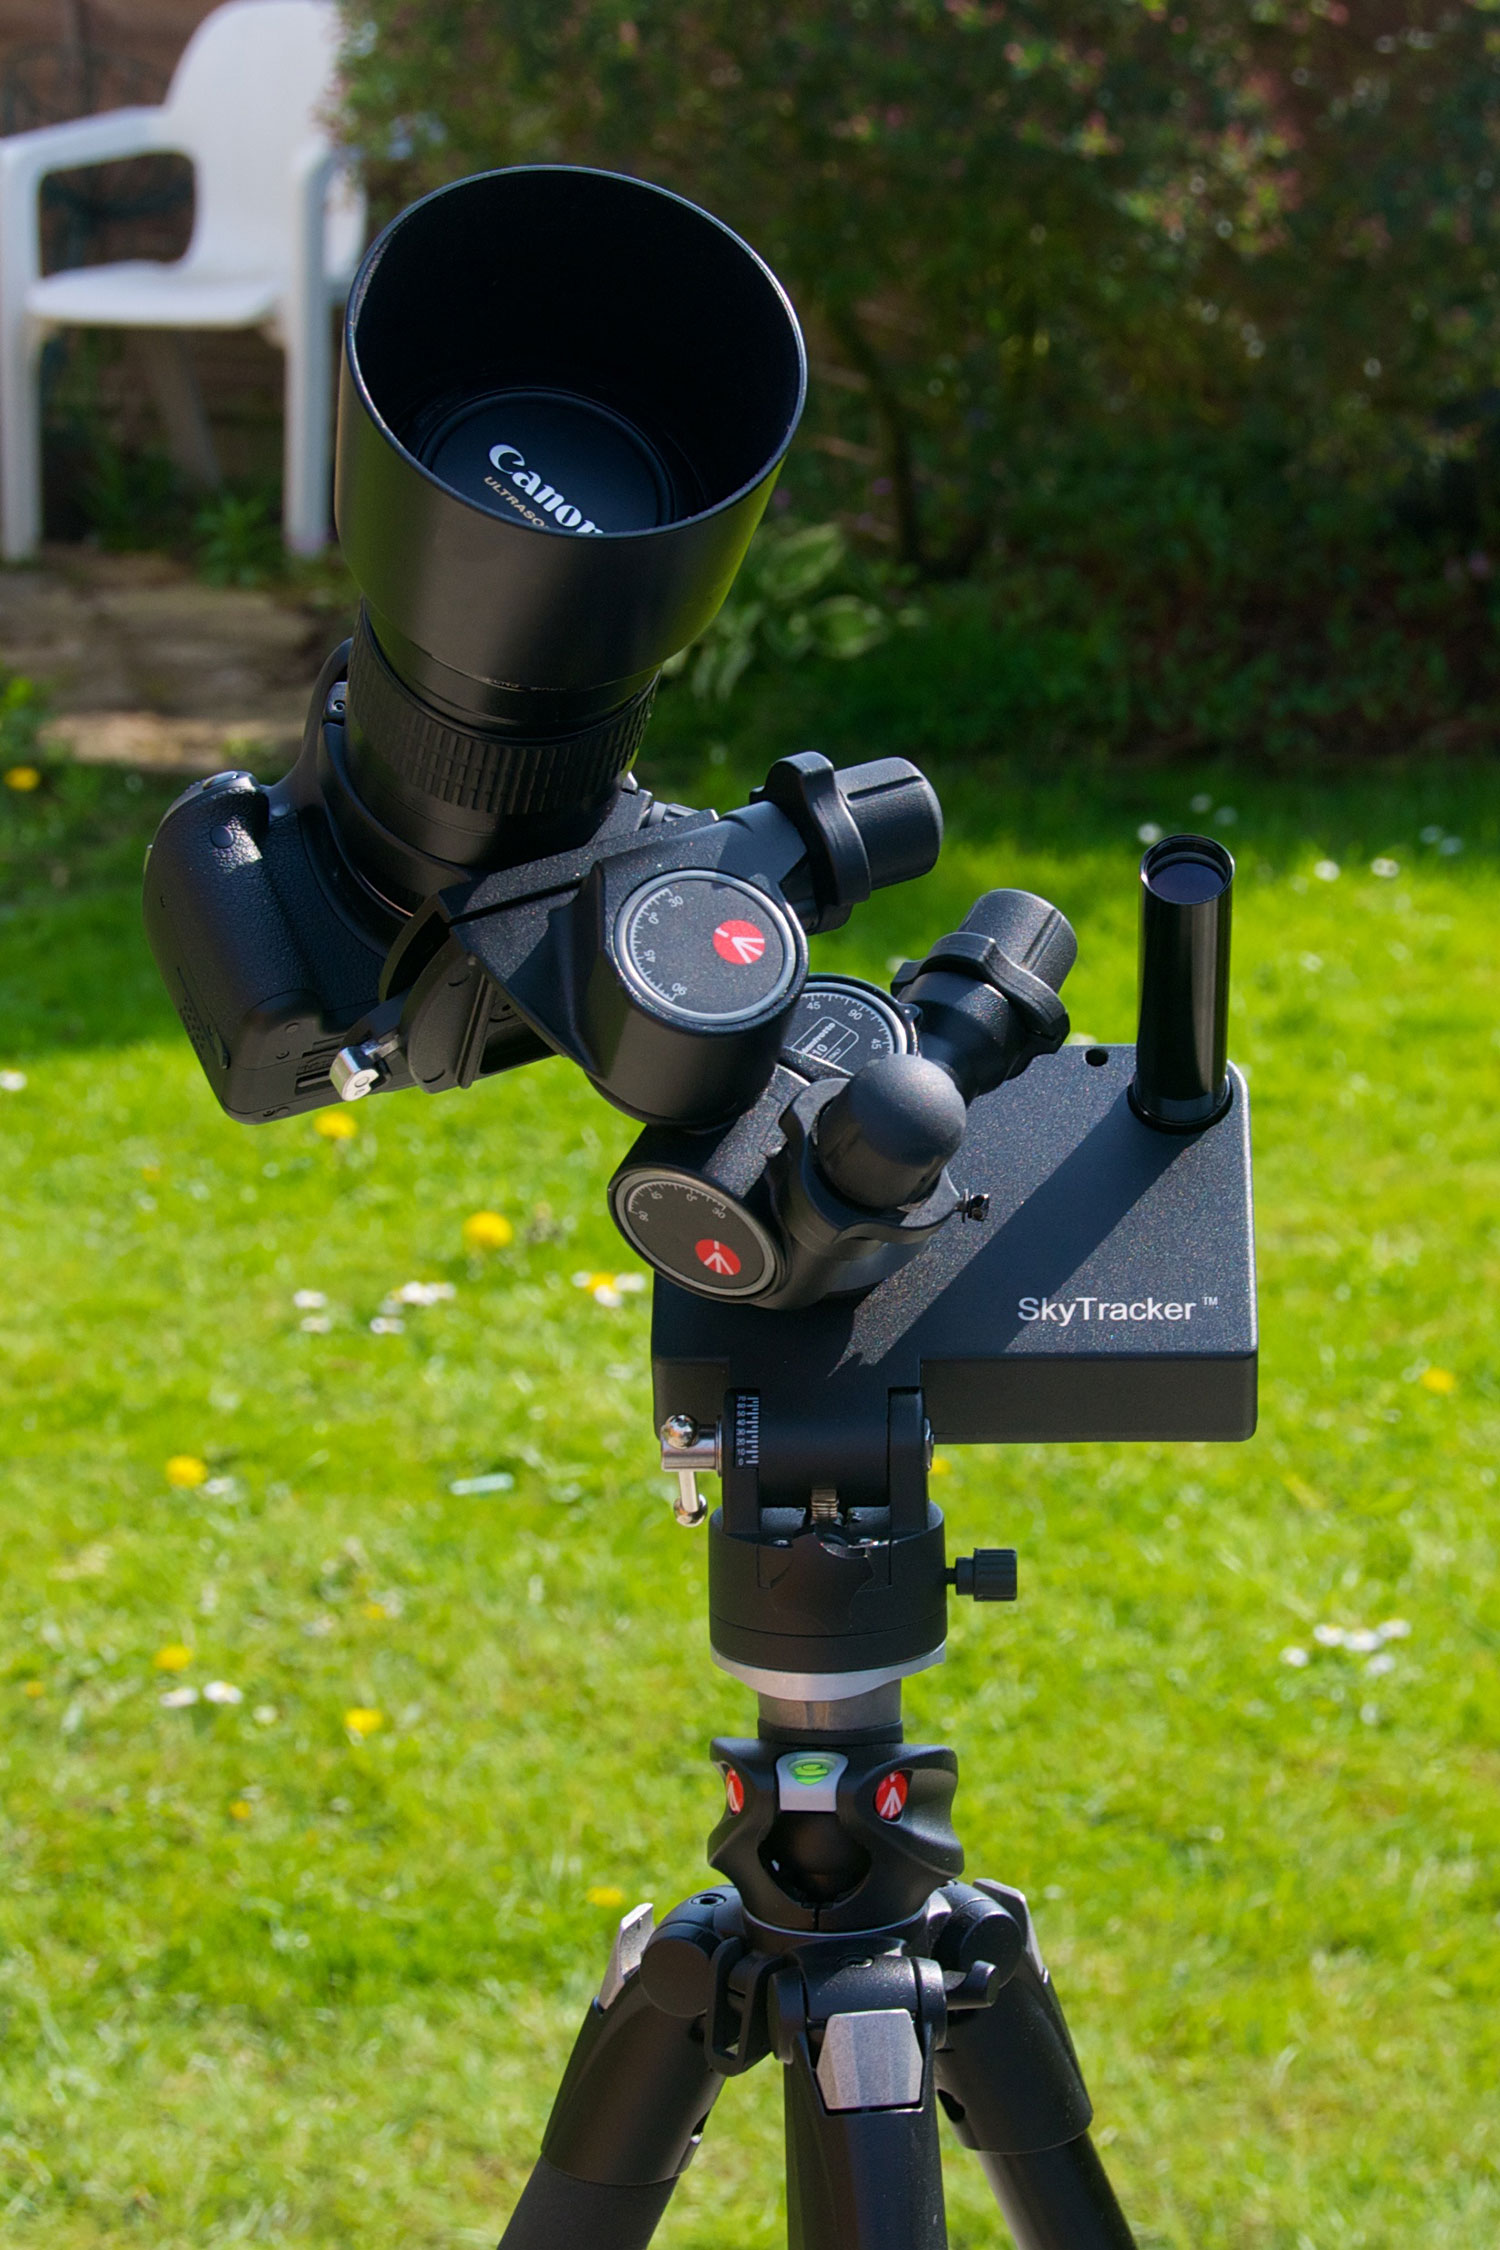
Tracking Camera Mounts
So far everything can be achieved with equipment you may already have, but to track the celestial motion you need to have an equatorial mount. This does not mean that you have to buy an expensive telescope mount though a tracking mount is a purchase you may want to make when you get a little more serious and want to start taking longer exposures. There are a number of systems on the market: Astrotrac, Vixen Polarie, and the iOptron SkyTracker are three popular ones. They all work on the same basic principal: the mount is aligned with the celestial pole (close to Polaris in the northern hemisphere) then the camera mount is rotated at the same rate as the stars revolve around the pole.
All of these mounts are light, small and very transportable, but require the addition of a tripod, and some kind of tripod head. With the addition of a simple programmable timer this makes for an excellent portable astrophotography system. The exposure can easily be increased from 30 seconds to 3 minutes even with a 200mm telephoto lens. With this type of setup you will be able to do some deep space photography and if you are anything like me you will get the bug and want to improve your skills and take your photography to another level.
Conclusion
As can be seen astrophotography does not have to involve huge expenditures and a lot can be done with equipment that you may already own or have access to. Obviously this is just an introduction to help you get started, and there are so many more levels to the subject. I will be covering some these in future articles, including planetary imaging which can done very easily using webcam.